Gold foil can make a leather wallet feel considered, not flashy. But the result depends on more than shiny foil. Leather varies in grain, finish, thickness, and surface oils. A method that works on a smooth notebook cover may fail on pebbled leather. The foil can lift at the corners. Or the impression can look too deep.
This guide explores How to print gold foil on leather goods, from choosing suitable materials to testing heat, pressure, and dwell time. It also compares common approaches, including hot foil stamping and suitable transfer systems. Leather-finishing specialist Daniel Mercer offers this practical reminder: “Test the exact leather and foil together; a beautiful sample proves little if the production hide behaves differently.” That’s the key. A small test patch can reveal weak adhesion, blurred edges, or unwanted gloss before a full run begins.
The sections ahead cover tools, surface preparation, temperature control, and common troubleshooting steps. Expect careful adjustments, not one magic setting. Even experienced makers may need to revise their setup when a leather batch changes. A little frustrating, honestly. The aim is crisp lettering and a durable gold finish, without scorching the leather or flattening its texture.
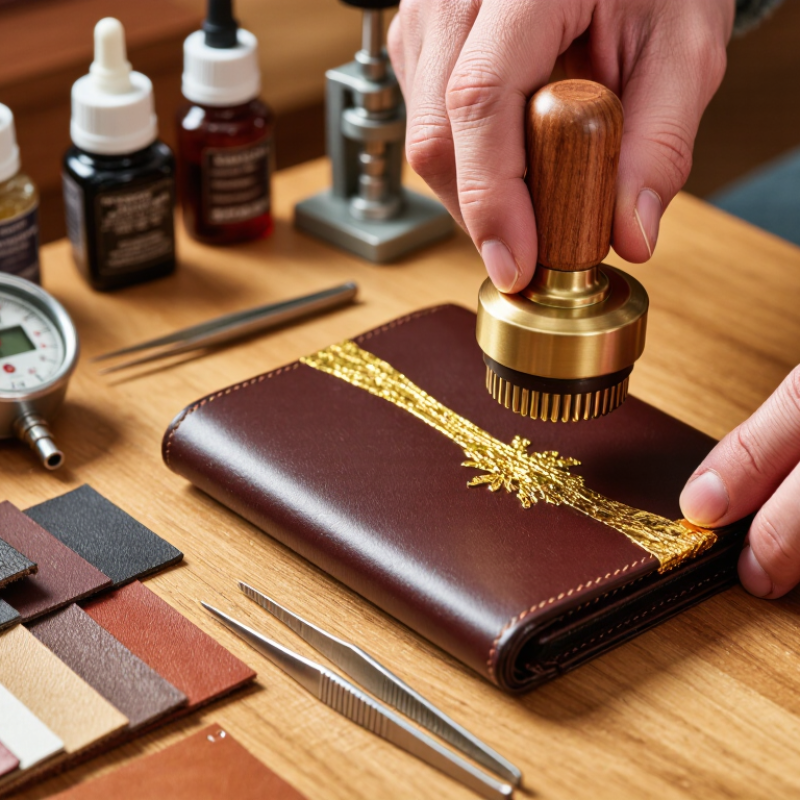
Before choosing hot-stamp foil, inspect the leather’s surface, not just its color. A smooth, pigmented finish usually offers a more consistent stamping area than open-pore aniline leather. Waxed or oiled leather can resist adhesion, while glossy coatings may soften or mark under heat. Look for a sealed topcoat, uneven grain, and areas where oils have darkened the surface.
Match the foil to both the finish and the stamping process. Foils made for coated materials may behave differently from those intended for absorbent leather. Check the supplier’s compatibility guidance, then test a small offcut from the same hide. Use light pressure and a short dwell time to begin. Too much heat can distort a coating; too little may leave broken lettering. Small details matter.
Let the test cool before judging it. Rub the impression gently, flex the leather, and check whether the edges lift or the finish changes color. A result that looks clean on a flat scrap may fail near a seam or curved edge. I have found that one test is rarely enough when hides vary across a batch. Adjust one setting at a time, and record the finish, foil type, temperature, pressure, and dwell time. That record helps, though it will not remove every surprise.
| Leather Surface or Finish | Typical Surface Behavior | Foil to Test First | Practical Stamping Guidance | Key Risk |
|---|---|---|---|---|
| Smooth, pigmented or coated leather | A relatively even surface with a protective color or finish layer. | Metallic hot-stamping foil specified for leather or coated substrates. | Begin with a small test using controlled heat, pressure, and dwell time. Check adhesion and appearance after the leather has cooled. | A highly cross-linked, waxy, or otherwise resistant topcoat may prevent the foil from bonding. |
| Aniline or lightly finished leather | Little surface coating; the grain and natural variation remain visible and the surface can be more absorbent. | A foil intended for leather, selected through a test on the actual hide. | Use a clean, flat area and assess both adhesion and color transfer. Test more than one location because natural leather can vary. | Uneven grain, oils, or natural surface variation can produce inconsistent transfer. |
| Patent or heavily coated leather | A smooth, glossy surface covered by a substantial finish layer. | A foil whose technical data supports the specific coating or synthetic top layer. | Test at conservative machine settings and inspect the finish for marking, softening, or gloss change. | Heat may damage the coating, while the smooth finish may make adhesion difficult. |
| Embossed or textured leather | Raised and recessed areas can prevent uniform contact with a flat stamping die. | Leather-compatible metallic foil, subject to a transfer test on the textured surface. | Use an appropriately sized die and even support behind the leather. Check whether the full design contacts the raised areas. | Foil may transfer unevenly into recesses or across pronounced grain. |
| Suede or nubuck | A fibrous, napped surface rather than a smooth, continuous top layer. | No direct foil choice is reliably suitable without testing; consider a smooth leather patch or label. | If direct stamping is required, make a test on scrap from the same material and inspect after handling. | The nap can reduce contact and lead to incomplete or weak transfer. |
| PU or PVC synthetic leather | A synthetic surface layer on a textile backing; its heat tolerance and chemistry vary by construction. | Foil explicitly recommended for the particular synthetic surface, such as a suitable plastic or coated-substrate grade. | Confirm compatibility with the material supplier and test at low heat first, increasing settings only as needed. | The surface may soften, warp, discolor, or fail to bond with a foil designed for a different substrate. |
Best practice: Identify the finish, then confirm foil compatibility with the foil supplier’s technical data. Test on offcuts from the same material and vary heat, pressure, and dwell time systematically. There is no single setting or foil grade that works for every leather finish.
Inspect it under bright, angled light. Brush away dust and loose fibers, then wipe gently with a lint-free cloth. Let it dry fully. Good light helps.
Test a suitable cleaning method on a hidden area first. Avoid oily cleaners and untested solvents; they may change the color or surface feel.
Place the item on firm, level support. Smooth raised fibers with light, even pressure. Check seams, piping, and curves for hidden ridges. Look twice.
Use scraps from the same hide. Start at a conservative temperature and increase it in steps of about 5°C. Keep pressure steady. My first test sheet is rarely perfect.
Try increments of half a second. Change one setting at a time, then inspect the cooled foil for gaps, crisp edges, or darkened grain. Test again.
Compare samples with a controlled dry-rub test, such as the method in ISO 11640:2018. A 50-cycle check may reveal early foil loss. Record conditions and take before-and-after photos.
ISO 11644:2016 measures leather finish adhesion. Ask the laboratory to report force in N/cm, sample location, and failure mode. It does not cover every aspect of foil adhesion.
ISO 11641:2012 evaluates leather color fastness to perspiration, including color change and staining. Ask for the grades, conditioning details, and confirmation that the stamped finish was tested.
No. They describe test methods, not one pass mark for every leather or use. Test folded and rubbed stamped panels, then note flaking, color transfer, or dull patches. Keep one imperfect sample.
How to print gold foil on leather goods begins with identifying the leather’s finish and selecting a compatible hot-stamping foil. Prepare the surface by removing dust and oils, then make sure the stamping area is flat and supported so the design transfers evenly. Set up the die and begin with small test stamps, adjusting heat, pressure, and dwell time gradually. Leather finishes respond differently, so avoid relying on a single setting for every material.
After stamping, check the result for clear coverage and consistent detail. Assess rub fastness using ISO 11640 with a 9 N test load, and evaluate finish adhesion and perspiration resistance with ISO 11644 and ISO 11641. These checks help reveal whether the foil is securely bonded and likely to withstand handling and wear. Keep a record of successful settings for each leather type and finish to improve consistency in future production.

 Diem printer