How to calibrate colors on a digital screen printer begins with a simple truth: the same file can look different on screen, film, and fabric. A bright red on a monitor may print dull on a black T-shirt. Calibration helps bring those stages closer, but it cannot erase every difference. Fabric, ink, temperature, and curing all matter.
Color scientist Dr. Roy S. Berns’s work offers a useful reminder: color appearance depends on viewing conditions, not numbers alone. Keep that in mind while building a repeatable workflow. Start with a clean printhead, stable room conditions, and the correct ink profile. Then check monitor brightness, confirm the printer’s white point, and print a small test chart on the actual garment material. Let it cure fully before judging it under consistent lighting. Small steps matter.
Look closely at the swatches. Is the gray neutral? Does the skin tone shift toward orange? Record the profile, fabric, ink settings, and curing details beside each test. This makes later adjustments less like guesswork. Still, calibration is not magic. A hurried test or a different batch of cotton can change the result. That part is easy to overlook.
This guide explains how to calibrate colors on a digital screen printer with practical checks, measurement tools, and troubleshooting steps. It also examines common mistakes, including trusting an uncalibrated monitor or changing several settings at once. Expect a process, not a perfect button. The goal is reliable color, repeatable prints, and fewer surprises on press.
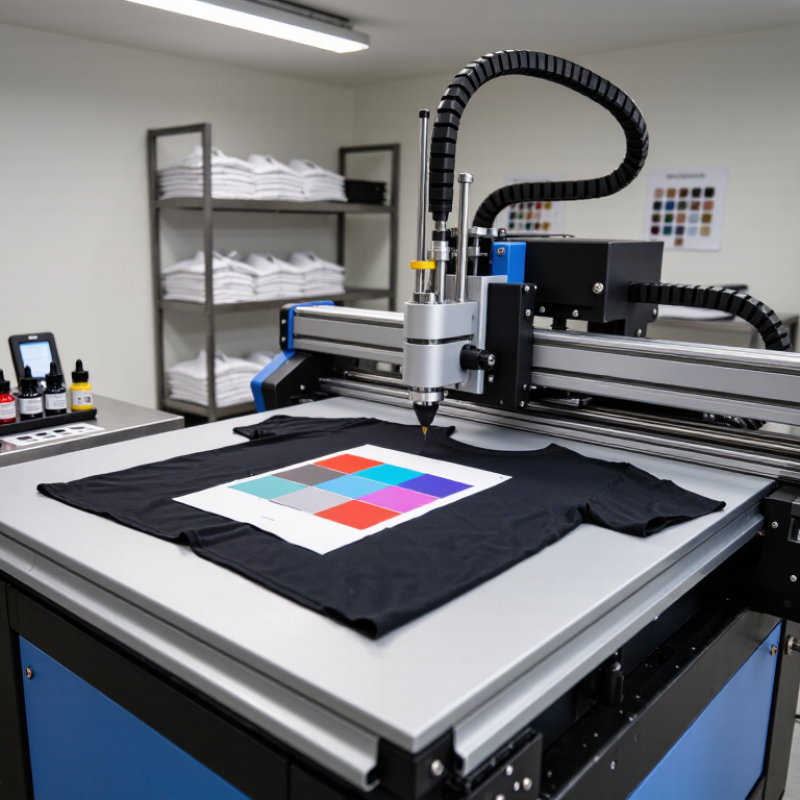
Assess the Printer, Ink, Substrate, and Viewing Conditions
How to Calibrate Colors on a Digital Screen Printer?
Assess the Printer, Ink, Substrate, and Viewing Conditions
Start with the printer, not the color slider. Check nozzle output, head alignment, and feed consistency before printing a test chart. Let the machine reach its normal operating temperature. A weak nozzle or uneven feed can make a sound color profile look wrong. I have sometimes blamed a color setting too quickly; the test print showed a mechanical issue instead.
Ink and substrate change how colors appear. Record the ink set and use the same material for calibration and production. A bright white sheet reflects color differently from a warm, absorbent fabric. Keep ink limits and curing settings consistent, then let samples dry or cure fully before judging them. Compare prints under steady, neutral lighting. A warm room lamp can make gray look beige, while a bright screen can make a print seem dull. That mismatch is easy to miss.
Tips: Label each test with its substrate, settings, and date. View the print beside the screen at a consistent distance. Keep screen brightness moderate. Change one variable at a time, and repeat the test if results shift. Calibration can feel tedious. It is still better than guessing.
Prepare the Display and Printer for Calibration
Before calibrating, let the display warm up for at least 30 minutes. Clean the screen, disable automatic brightness, night mode, and vivid presets. Set the room lighting steady; a moving sunbeam can shift what your eyes perceive. ISO 3664:2009 specifies 500 lux illumination for the P2 print-viewing condition, with a D50 light source. Use that as a practical reference when comparing screen colors with printed samples. Measure the light near the print, not across the room.
Set the display to a neutral, consistent mode and use a hardware colorimeter to measure its white point, luminance, and tone response. For print matching, D50 is a useful target when the viewing booth also uses D50; the ICC profile should describe the display’s measured behavior. Avoid guessing from a white patch. It can look clean while still being too blue or too bright. Small differences matter.
Prepare the printer before making test prints. Check nozzle health, ink levels, media type, and the selected output profile. Use the same paper and settings for every calibration sheet, and allow prints to dry before judging them under the viewing light. Record the display settings and printer conditions. I sometimes rush this part; that makes the comparison less trustworthy. Calibration cannot fix a clogged nozzle or inconsistent media, and that is easy to overlook.
How to Calibrate Colors on a Digital Screen Printer? - Prepare the Display and Printer for Calibration
| Preparation Area |
Recommended Target or Action |
How to Verify |
| Monitor warm-up |
Turn on the display for at least 30 minutes before measuring or profiling it. |
Confirm the display has been on and operating steadily before calibration begins. |
| Display white point |
Use D65 (approximately 6500 K) as a common starting target for general graphic work; follow the print workflow’s specified viewing condition when available. |
Set the target in the display-calibration software and measure with a colorimeter or spectrophotometer. |
| Display luminance |
Start around 100–120 cd/m² in a controlled room. The appropriate level depends on ambient light and the print-viewing environment. |
Measure luminance with a display instrument rather than relying on the monitor brightness slider. |
| Display tone response |
Use a gamma target of 2.2 for common computer workflows unless the color-management specification calls for a different tone response. |
Choose the target in the calibration software and review the resulting profile report. |
| Ambient lighting |
Keep room lighting stable and avoid direct light or reflections on the display. For print evaluation, use a controlled viewing booth when available. |
Check the screen for glare and keep the viewing conditions consistent during calibration and proof assessment. |
| Printer and ink system |
Complete the printer’s recommended warm-up and maintenance checks. Confirm the intended ink set is installed and that nozzles are firing correctly. |
Run a nozzle check and resolve missing or misdirected nozzles before making calibration prints. |
| Substrate and print settings |
Use the exact production substrate and the matching media, resolution, and print-quality settings intended for the job. |
Record the substrate and print settings; changing them can alter the printer’s color output. |
| Color-management setup |
Use the correct output profile for the printer, ink, substrate, and print mode. Avoid applying unintended color conversions in multiple applications or drivers. |
Confirm the selected profile and color-conversion settings in the RIP or print workflow before printing calibration targets. |
| Calibration environment |
Keep temperature, humidity, and lighting as steady as practical, and use the same measurement instrument and procedure for repeat checks. |
Note environmental conditions and instrument details so later measurements can be compared consistently. |
Note: These are practical starting points, not universal printer specifications. Follow the printer, ink, substrate, and color-management workflow requirements when they differ.
Measure Color Output and Create a Printer Profile
A dependable printer profile begins with measured output, not visual guesses. Warm the printer, stabilize the room, and use the production ink, substrate, and curing settings. Print a chart with neutral grays, primary colors, and several tone steps. Measure each patch with a spectrophotometer, then save the readings alongside the job settings.
Small shifts matter.
A white shirt and a coated sheet can produce different readings, even with identical artwork.
Keep the measurement conditions consistent. ISO 3664:2009 specifies D50 lighting and 2,000 ± 500 lux for critical print evaluation.
ISO 12647-5:2015 provides process-control guidance for screen printing. Use these references to control the viewing and production environment, not as a substitute for measuring your own printer.
Build an ICC profile from the chart readings, then print a verification chart and compare its measured values with the profile’s predictions. Review color differences, especially in neutral grays and dark tones. If they drift, check nozzle condition, ink limits, curing, and substrate before rebuilding the profile.
I have found that a “good-looking” test can still hide weak shadow detail. That is worth questioning.
Keep dated profiles and measurement files, since a profile made for one setup may mislead on another.
Apply Profile Corrections and Verify Printed Results
A stable profile starts with a stable press. Let the printer reach its normal operating temperature, then use the production substrate, ink set, and print settings. Print a measured color target, not a file with unknown adjustments. A spectrophotometer records the patches and helps build or refine the ICC profile. Keep the target clean and flat. Small handling errors can distort readings.
Apply the profile correction in the RIP, then print a fresh verification chart. Compare measured patches with their intended values using ΔE00, not visual judgment alone. ISO 12647-2:2013 gives an average ΔE00 tolerance of 2.5 for solid primaries, with a maximum of 5.0. That standard addresses offset printing, so treat its figures as a useful reference, not a universal screen-printing requirement. Fogra’s ProcessStandard Digital also offers a production-control framework for evaluating digital print consistency.
Check neutrals, skin tones, and saturated colors under consistent viewing light. If grays shift green, review ink limits and profile measurements before changing individual colors. Change one variable at a time, then reprint the chart. Keep records of the profile version, substrate, and measured results. This part is easy to skip. I have seen acceptable charts hide weak dark tones; the profile looked tidy, but the printed shadows lost detail. Recheck those areas on the actual job.
Maintain Calibration Through Routine Checks and Updates
A digital screen printer stays calibrated only when checks happen between jobs, not just after a color complaint. At the start of each shift, print a small control strip on the actual substrate. Measure solid colors and neutral grays with a spectrophotometer, then compare readings with the approved target. Keep the room lighting steady, and record ink batch, mesh, squeegee settings, and substrate lot. Small changes matter. A warmer fabric can shift a gray even when the printer settings stay untouched. If readings drift, clean the printhead, verify ink circulation, and repeat the strip before adjusting profiles.
Set a practical review schedule: check daily, review trends weekly, and recalibrate after maintenance, ink changes, or a new substrate. ISO 12647-2:2013 gives an average ΔEab tolerance of 5 and a maximum of 8 for process-color solids in its specified printing conditions. Treat those figures as a comparison point, not a universal screen-printing pass/fail rule; the standard addresses different process conditions. G7 guidance also emphasizes gray balance and tonal response, useful checks when a print looks dull despite acceptable solids. Keep dated measurement records and update profiles only from verified readings. Honestly, one clean test strip cannot prove long-term stability. Patterns across several shifts tell the more useful story.
Conclusion
How to calibrate colors on a digital screen printer begins with assessing the printer, inks, substrate, and viewing conditions, since each can affect the final appearance of a print. Prepare both the display and printer by allowing equipment to stabilize, checking that the correct materials are loaded, and creating consistent lighting for evaluation. A reliable starting point helps make color measurements more useful and repeatable.
Next, measure printed color output with suitable calibration tools and use the results to create a printer profile for the chosen ink and substrate combination. Apply the profile’s corrections, then print and inspect a verification chart or test image to confirm that the results are consistent with the intended colors. Because equipment, materials, and conditions can change over time, perform routine checks and update the profile when measurements show a meaningful shift. Regular calibration supports more predictable color across print jobs.

 Diem printer