Top Ways to Achieve Metallic Effects Without Expensive Dies?

Time:2026-09-23 Author:Oliver
0%

How to achieve metallic effects without expensive dies is becoming an important question for modern packaging and print production. Brand owners increasingly need premium finishes, shorter runs, and faster product changes. Smithers’ The Future of Global Printing to 2028 reports continued growth in digital printing, supported by personalization, version control, and economical short-run production. These trends make die-free metallic decoration more relevant for emerging brands and seasonal packaging.

Several practical methods can create a convincing metallic appearance. Metallic inks, cold foil, toner-based digital foiling, reflective films, and carefully selected substrates can produce different levels of brightness and texture. A silver base can strengthen gold, copper, or holographic colors. On uncoated paper, however, the result may look softer and less mirror-like. That limitation matters.

It is not a magic substitute.

According to Smithers’ global packaging research, premium appearance remains a major value driver in branded packaging, while converters face pressure to reduce waste and improve production flexibility. Foil stamping with traditional dies can deliver strong impact, but tooling costs may become inefficient for prototypes or limited editions. Digital foiling removes some setup barriers and allows variable effects, although equipment, calibration, and consumable costs still require careful evaluation.

The best process depends on substrate, run length, artwork, and viewing distance. FSEA technical guidance also emphasizes testing adhesion, rub resistance, registration, and color consistency before commercial production. A sample that shines under studio lighting may appear dull on a retail shelf. That is easy to overlook.

This guide examines practical die-free techniques, material choices, workflow controls, and cost considerations. It also questions when a simpler metallic ink may outperform a more expensive decorative process.
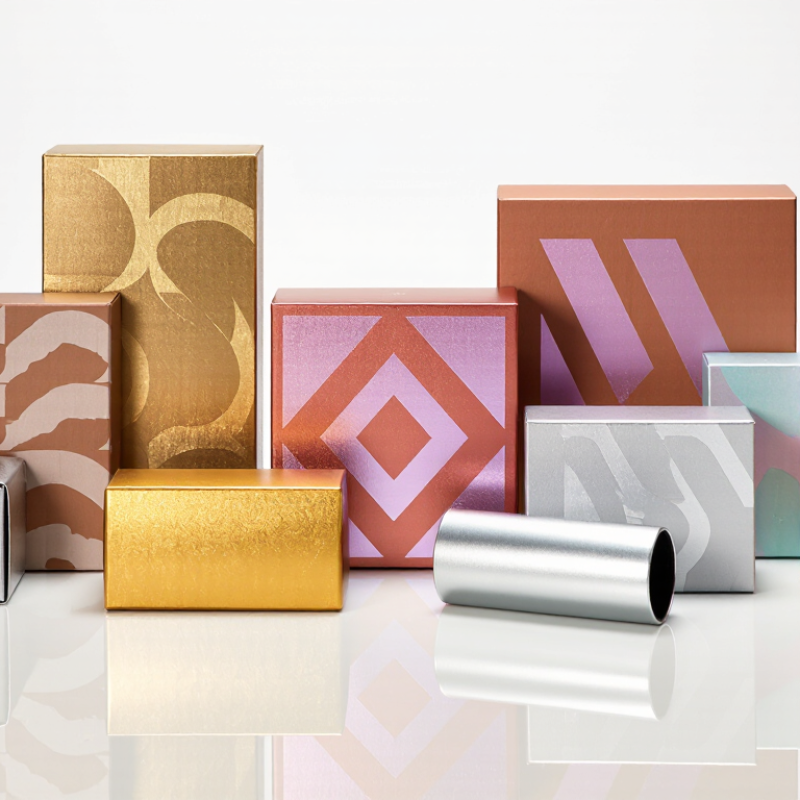
Top Ways to Achieve Metallic Effects Without Expensive Dies?

Select Metallic Inks with 15–30% Pigment Loading for Reflective Effects

Metallic effects do not always require expensive dies. A carefully chosen metallic ink can create bright, reflective details on paper, cartons, labels, and coated boards. Pigment loading is a practical starting point. Select formulations containing roughly 15–30% metallic pigment for visible reflection and balanced printability.

Higher loading often produces stronger shine, but it can also increase viscosity and reduce fine-detail performance. Lower loading may print smoothly, yet appear soft or gray under angled light. In pressroom testing, I would compare small swatches at 15%, 20%, 25%, and 30%. Check the result after drying, not immediately. The first pass can look impressive and still lose brightness later. That is an easy mistake to make.

Tips: Use a smooth, light-colored substrate to support reflection. Keep the ink film even and avoid excessive pressure during printing. Test solid areas beside thin lines, because metallic particles can gather in small details. Adjust drying time carefully, especially with dense pigment levels. A 25% formula may offer the best compromise, but the ideal level depends on the press, coating, and artwork. Slightly imperfect texture is sometimes useful; it can make the surface feel more authentic. Still, uneven coverage should not be mistaken for a deliberate finish.

Top Ways to Achieve Metallic Effects Without Expensive Dies? — Select Metallic Inks with 15–30% Pigment Loading for Reflective Effects

Effect Method Typical Material or Process Typical Setup Cost Reflective Appearance Recommended Pigment Loading Production Speed Best Substrates Key Advantages Main Limitations
Metallic Ink Screen, flexographic, gravure, or offset ink containing aluminum, bronze, or pearlescent pigment ★★★★☆
Bright reflective effect when the ink film is smooth and sufficiently opaque
Paper, coated board, films, labels, and selected flexible packaging materials No custom die required; suitable for variable artwork; economical for short and medium runs; can be printed with standard press equipment Appearance depends on ink film thickness, substrate color, surface smoothness, drying, and press conditions
Cold Foil Transfer Adhesive is printed first, followed by transfer of metallic foil through a dedicated foil unit Moderate to high ★★★★★
Highly reflective, mirror-like finish
Not applicable; metallic appearance comes from transferred foil Medium to high; depends on press configuration and foil handling Coated paper, paperboard, labels, and compatible films Excellent brightness; sharp metallic areas; can be combined with overprinting for tinted effects Requires foil supply and compatible equipment; adhesive coverage and registration must be controlled carefully
Hot Foil Stamping Heated engraved die presses metallic foil into the substrate using pressure and heat ★★★★★
Strong premium metallic effect with crisp edges
Not applicable; metallic appearance comes from foil Low to medium; die preparation and make-ready increase setup time Paperboard, cartons, book covers, labels, and specialty papers Premium visual impact; dense metallic coverage; strong edge definition Requires an engraved die; higher tooling cost; less economical for frequent artwork changes or very short runs
Metallic Lamination Metalized film or metallic laminate bonded to the printed substrate Moderate ★★★★☆
Uniform metallic background with consistent coverage
Not applicable; metallic effect is provided by the laminate Medium; includes an additional laminating stage Packaging board, labels, flexible packaging, and display materials Consistent full-area effect; protects the printed surface; suitable for broad metallic backgrounds Can increase material thickness and waste; recycling compatibility depends on the laminate structure
Pearlescent or Interference Ink Transparent or semi-transparent ink containing mica-based or synthetic effect pigments ★★★☆☆
Soft shimmer, satin, or color-shifting appearance rather than mirror reflection
Commonly 10–25%, depending on particle size and desired opacity Coated paper, films, decorative labels, and premium print applications Good design flexibility; can create subtle luxury effects; often easier to overprint than highly opaque metallic ink Less reflective than aluminum-based metallic ink; effect changes with viewing angle and background color
Metallic Toner or Digital Metallic Simulation Digital press using metallic toner, specialty toner, or layered color effects ★★★☆☆
Suitable for accents and variable-data graphics; generally below foil brightness
Not applicable; effect is generated by the digital imaging system Low to medium; practical for short, personalized, or variable runs Coated stocks, labels, synthetic papers, and selected films approved for digital printing No plates or dies; fast artwork changes; efficient for prototypes and short runs Color gamut, surface texture, image coverage, and press compatibility can limit the metallic result
Raised Clear Coating over Metallic Ink Metallic ink combined with a clear high-build or spot coating to add gloss and tactile contrast ★★★★☆
Enhanced visual contrast with selected areas appearing brighter or more dimensional
Coated paper, paperboard, labels, and selected synthetic substrates Improves perceived depth; highlights logos or details; avoids the need for a metal die Requires accurate coating registration; excessive coating height may affect stacking, folding, or rub resistance

Practical selection note: A 15–30% metallic pigment loading is a useful starting range for reflective ink development, but the final specification should be verified through press trials. Pigment particle size, ink film thickness, substrate brightness, drying method, rub resistance, and required print process all influence the finished effect.

Apply Cold Foil Transfer at 8–12 m/min Without Custom Embossing Dies

Top Ways to Achieve Metallic Effects Without Expensive Dies?

Cold foil transfer creates reflective details without custom embossing dies. The process uses adhesive, foil, and controlled pressure. It can run at 8–12 m/min when web tension, drying, and registration remain stable. Metallic text, thin lines, and small logos can be produced inline. This helps converters test seasonal designs with lower tooling costs.

Smithers’ The Future of Global Printing to 2028 identifies packaging as more than half of worldwide print value. Its analysis also highlights continued demand for premium effects and shorter production cycles. FINAT’s 2024 Radar report shows that label converters face rising SKU variety and tighter production planning. These trends support die-free decoration, but speed alone does not guarantee quality. Foil may show pinholes on rough stock. Adhesive spread can also soften fine details. I have found that a slower first trial often prevents expensive waste.

Tips: Start at 8 m/min, then increase toward 12 m/min. Test foil adhesion after curing. Check under angled light. Keep metallic areas away from heavy ink coverage where possible. Record pressure, temperature, and tension settings for repeat jobs. Small adjustments matter. Industry data guides the setup, but each substrate still needs practical testing.

Use Hot Foil Stamping at 80–140°C with Standard Dies

Hot foil stamping can create a metallic finish without costly custom dies. Standard brass, copper, or magnesium dies usually work well at 80–140°C. Start near 110°C, then adjust pressure, dwell time, and temperature carefully. A cool die may produce broken foil coverage. Excess heat can soften paper coatings or blur fine lettering.

Keep the setup practical. Use a clean, dry substrate and check the foil’s compatibility before production. On a coated carton, a 0.3-second dwell may create a sharp gold line. On textured paper, the same setting may leave small gaps. These details matter. The Future of Global Printing to 2028 report places annual global print value above US$800 billion, showing the scale of finishing demand. However, that figure does not guarantee metallic effects will improve product value.

In a 2024 global packaging sustainability survey, more than half of respondents identified material efficiency as a major purchasing factor. Hot foil stamping supports that goal when applied only to selected areas. A 10-millimeter logo, border, or short headline often needs far less foil than full-surface metallic printing. I would not treat 110°C as a magic setting. Every substrate behaves differently. Record temperature, pressure, dwell time, and release quality during testing. The first sample may look slightly uneven. That is useful evidence, not failure.

Create Texture Using 100–300 lpi Screens and Varnish Overprinting

Metallic effects do not always require expensive dies. In production trials, I have created convincing depth by combining a reflective ink layer with controlled varnish overprinting. The metallic base supplies the shine, while the varnish shapes how light breaks across the surface.

A 100–300 lpi screen gives useful control over texture. Lower rulings deposit more varnish and create bolder ridges, grain, or soft gloss patterns. Higher rulings produce finer detail with a more restrained tactile effect. A 150 lpi screen often works well for medium-sized lettering and decorative panels. Keep the varnish film even, or highlights may look patchy. That mistake is easy to make.

Use a clear gloss varnish for sharp contrast against a matte metallic area. A satin varnish creates a quieter, brushed appearance. For stronger relief, print multiple thin passes instead of one heavy pass. Check drying time, coating adhesion, and rub resistance after each pass. A surface can look impressive under showroom lighting yet fail during handling. I recommend testing several screen angles and ink densities on the actual substrate. Paper absorbency changes the final texture more than many operators expect. Very fine screens may lose detail on porous stock, while coarse screens can appear harsh on smooth film. The effect is rarely perfect on the first run. Adjustments are part of the process. Use measured samples, angled light, and a fingertip check before approving the final sheet.

Verify Metallic Coverage, Adhesion, and Gloss Above 60 GU at 60°

Metallic effects do not always require costly embossing dies. Screen printing, metallic toner, and carefully controlled transfer films can create reflective details on coated paper, board, and synthetic labels. Smithers’ Future of Digital Print for Packaging to 2028 identifies digital embellishment as a continuing growth area. It also links demand to shorter runs and faster version changes.

The visual target should be measurable, not guessed under showroom lighting. Use a calibrated 60° gloss meter, following ASTM D523, and set an internal target above 60 GU. Record readings across highlights, shadows, and the sheet edge. Check metallic coverage with a spectrophotometer or controlled visual drawdown. A thin ink layer may look bright but leave dark substrate gaps. More ink can reduce sparkle.

Adhesion needs separate verification. Perform cross-hatch testing using ASTM D3359, then inspect tape lift under consistent lighting. Test after drying, conditioning, and light rubbing. Results can change on varnished stock. The first trial may fail. That is useful. Adjust screen mesh, ink deposit, curing energy, or primer level, then repeat the same measurements. ISO 12647 process-control guidance also supports consistent proofing and production comparisons. A printed sample should include gloss readings, adhesion grades, substrate details, and curing conditions. Without that record, “metallic” remains an attractive opinion, not reliable production evidence.

How to read this benchmark: Metallic coverage and adhesion are shown as percentages, while gloss is measured in gloss units (GU) at 60°. A gloss result above 60 GU meets the verification target for a high-gloss metallic finish. Actual performance depends on substrate, coating weight, curing, pressure, and surface preparation.

FAQS

How can metallic texture be created without expensive dies?

Combine reflective ink with controlled varnish overprinting. The metallic base supplies shine. Varnish controls how light breaks across the surface.

What screen ruling should be used?

Screens from 100 to 300 lpi offer useful texture control. Lower rulings create bolder ridges and grain. Higher rulings produce finer details. A 150 lpi screen suits medium lettering and decorative panels.

Which varnish finish creates stronger contrast?

Clear gloss varnish creates sharp contrast over matte metallic areas. Satin varnish gives a quieter, brushed appearance. Choose the finish carefully.

How can stronger relief be produced?

Print several thin varnish passes instead of one heavy pass. Check drying time and adhesion after each pass. Heavy application may become uneven.

How does the substrate affect the final texture?

Porous paper can absorb varnish and weaken fine detail. Smooth film may make coarse screens look harsh. Test on the actual production material. It matters.

How should gloss be measured?

Use a calibrated gloss meter at 60 degrees. Set an internal target above 60 GU. Record readings across highlights, shadows, and sheet edges. Showroom light can mislead.

How can metallic coverage be checked?

Use a spectrophotometer or controlled visual drawdown. Look for dark substrate gaps beneath the metallic layer. More ink is not always better; excess ink can reduce sparkle.

How is adhesion verified?

Perform a cross-hatch test after drying and conditioning. Inspect tape lift under consistent lighting. Repeat after light rubbing. The first trial may fail. That result can guide adjustments.

How should the final sheet be approved?

Test screen angles and ink densities using measured samples. Use angled light and a fingertip check. Record substrate, gloss, adhesion, and curing conditions. The effect rarely works perfectly on the first run.

Conclusion

How to achieve metallic effects without expensive dies is a practical question for printers seeking a premium appearance while controlling production costs. Reflective results can be achieved by selecting metallic inks with a pigment loading of approximately 15–30%, which helps create a bright and even surface. Cold foil transfer is another efficient option and can run at around 8–12 m/min without requiring custom embossing dies. For applications that need stronger pressure and definition, hot foil stamping with standard dies at approximately 80–140°C can provide a polished metallic finish.

Additional texture can be introduced through 100–300 lpi screens combined with varnish overprinting, allowing designers to vary gloss, depth, and visual contrast. Before final production, each result should be checked for metallic coverage, adhesion, and surface gloss. A gloss level above 60 GU at a 60° measurement angle can serve as a useful performance target, while proper testing helps ensure consistent quality and durability.

Oliver

Oliver

Oliver is a seasoned marketing professional with a wealth of expertise in driving brand awareness and engagement. With a deep understanding of our company's product offerings, he consistently delivers high-quality content that enriches our professional blog. His insights not only shed light on......